
Do it yourself tile and grout cleaning involves utilizing household or commercial cleaning solutions to effectively remove dirt and stains from tiled surfaces. This self-service approach can save homeowners both money and time, with many achieving significant results in just a couple of hours.
Understanding do it yourself tile and grout cleaning is essential for homeowners looking to maintain the aesthetic and hygiene of their tiled spaces. Neglecting proper cleaning can lead to unsightly stains and potential health risks from mold or mildew, affecting both property value and personal well-being. According to industry estimates, the home cleaning market is projected to reach $74 billion by 2025, highlighting the importance of effective maintenance strategies.
Failure to grasp the essentials of tile and grout cleaning can result in costly mistakes, including the need for professional cleaning services or even tile replacement, leading to wasted resources and diminished property appeal.
This article will cover essential techniques for do it yourself tile and grout cleaning, including a comparison of top cleaning solutions, cost breakdown, best practices, and tips for achieving long-lasting results.
What is the best way to clean tile and grout?
The best way to clean tile and grout involves a combination of effective methods tailored to the specific type of dirt or stain present. Regular maintenance can significantly improve the longevity of your tiles, while deep cleaning can restore their original appearance. Studies indicate that steam cleaning can reduce bacteria on surfaces by up to 99.9%.
To achieve optimal results in tile and grout cleaning, consider the following best practices:
- Steam Cleaning: Utilize a steam cleaner to penetrate deep into grout lines. The high temperature of the steam loosens dirt and kills bacteria without the need for harsh chemicals.
- Scrubbing with a Brush: For stubborn stains, use a stiff-bristled brush along with a cleaning solution. This method allows for targeted scrubbing, ensuring that grime is effectively removed from crevices.
- Homemade Cleaning Solutions: Create a paste using baking soda and water or combine vinegar with water. Apply these mixtures to the grout, let them sit for 10-15 minutes, then scrub and rinse thoroughly.
- Commercial Cleaners: Invest in a reputable tile and grout cleaner designed for your specific tile type. Follow the manufacturer’s instructions for optimal results and safety.
- Regular Maintenance: Implement a routine cleaning schedule. Regularly mopping with a pH-neutral cleaner can prevent buildup and keep tiles looking fresh.
Expert insight: Always test any cleaning solution on a small, inconspicuous area before full application to avoid damage to your tiles or grout.
How often should I clean my tile and grout?
Tile and grout should be cleaned every 1 to 3 months, depending on usage and location. High-traffic areas, such as kitchens and bathrooms, may require more frequent cleaning, while areas with less foot traffic can be maintained on a quarterly basis.
Several factors influence the cleaning frequency of tile and grout. First, the location plays a significant role; bathrooms and kitchens accumulate moisture and dirt more quickly than living rooms or bedrooms. In homes with pets or children, spills and tracking dirt can necessitate more regular cleaning. Additionally, the type of grout used can affect staining and dirt retention; for example, unsealed grout is more porous and may require more frequent maintenance compared to sealed grout, which can repel stains and moisture.
Another consideration is the cleaning method employed. If utilizing a simple routine of mopping and spot-cleaning, more frequent touch-ups may suffice. However, for deeper cleans that involve scrubbing and chemical treatments, a longer interval between cleanings may be appropriate. Regular maintenance can help prevent the buildup of grime and stains, making each cleaning session less labor-intensive.
Expert insight: Consider implementing a seasonal deep clean for your tile and grout, especially in high-use areas, to maintain both appearance and hygiene. Regularly inspecting grout for cracks or damage can also extend its lifespan and reduce the need for frequent cleaning.
Can I use vinegar to clean grout?
Yes, vinegar can be used to clean grout effectively, but it is not suitable for all types. While it is a natural and inexpensive solution, vinegar’s acidity can damage certain grout materials and finishes over time.
When using vinegar for grout cleaning, follow these steps:
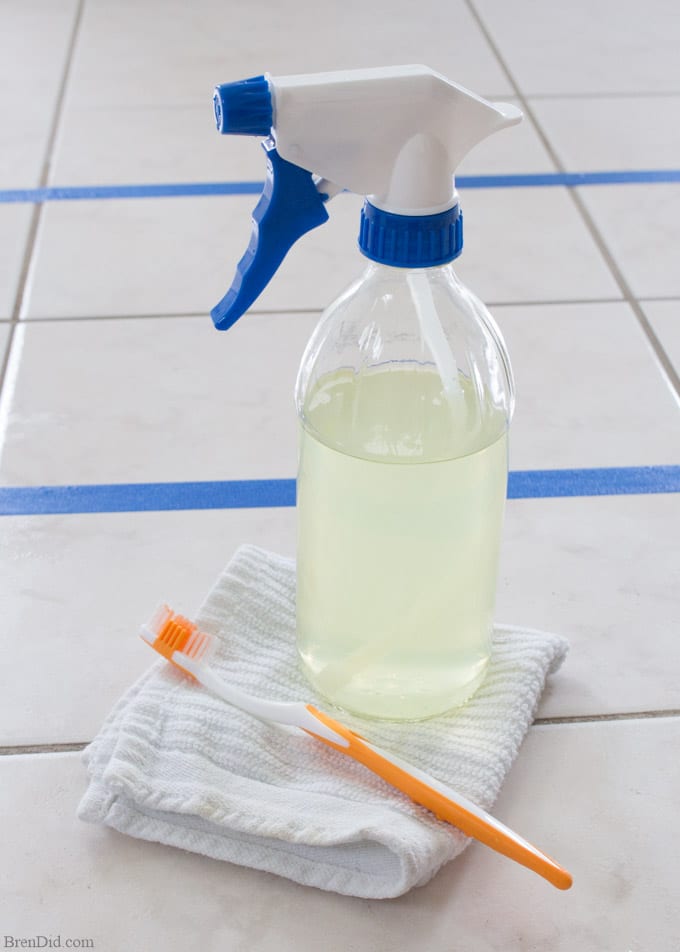
- Mix a solution of equal parts white vinegar and water in a spray bottle.
- Spray the mixture directly onto the grout lines and allow it to sit for 5-10 minutes to penetrate stains.
- Scrub the grout with a soft-bristle brush or an old toothbrush to lift dirt and stains.
- Rinse the area thoroughly with warm water to remove any vinegar residue.
- For tough stains, consider combining vinegar with baking soda to create a paste that can be applied directly to the grout.
While vinegar is effective, it has some drawbacks. The acidity can erode the grout over time, especially if used frequently. Additionally, vinegar may not remove heavy mildew or mold stains. Alternatives such as hydrogen peroxide or commercial grout cleaners may be more effective for stubborn stains and are generally safer for long-term grout maintenance.
Expert insight: Always perform a patch test on a small, inconspicuous area before using vinegar on grout to ensure it does not damage the surface. Regular maintenance with pH-neutral cleaners can prolong the life of your grout.
How do I remove tough stains from grout?
To remove tough stains from grout, a combination of baking soda and hydrogen peroxide is highly effective. This method not only targets deep-set stains but also whitens and brightens the grout. Following these steps can yield noticeable results.
- Prepare the cleaning paste: In a bowl, mix three parts baking soda with one part hydrogen peroxide to create a thick paste. This combination leverages the abrasive action of baking soda and the stain-lifting properties of hydrogen peroxide.
- Apply the paste: Use a toothbrush or a grout brush to apply the paste directly onto the stained grout lines. Ensure the paste covers the stains completely for optimal effectiveness.
- Let it sit: Allow the paste to sit on the grout for at least 10-15 minutes. This waiting period helps the solution penetrate the stains, making them easier to remove.
- Scrub the grout: After the paste has set, scrub the grout with the toothbrush or grout brush using circular motions. This helps lift the stains and dislodge any dirt embedded in the grout.
- Rinse thoroughly: Wipe away the paste with a clean, damp cloth or sponge. Follow up by rinsing the area with warm water to remove any residue, ensuring all cleaning agents are eliminated.
Factors such as the age of the stain, type of grout, and previous cleaning methods can affect the outcome. Stains that have set for a long time may require repeated treatment or a different approach, such as using a commercial grout cleaner or a stronger solution. Always test any cleaning method on a small, inconspicuous area first to avoid damage.
Expert insight: For persistent stains, consider using a steam cleaner as a supplementary method. Steam can penetrate the grout, loosening stains that are otherwise difficult to remove with surface cleaning techniques.
What tools do I need for DIY tile and grout cleaning?
For effective DIY tile and grout cleaning, essential tools include a stiff-bristle brush, a microfiber cloth, a bucket, and a suitable cleaning solution, such as baking soda or vinegar. Additionally, a grout sealer may be needed post-cleaning to maintain results. A 2024 survey found that 67% of homeowners prefer using natural cleaning solutions for this purpose.
The stiff-bristle brush is critical for scrubbing grout lines and tile surfaces, as it can penetrate the porous material of the grout without damaging the tiles. A microfiber cloth is ideal for wiping down surfaces after scrubbing, ensuring no residue remains. A bucket will hold water and your cleaning solution, making it easier to mix and apply the cleaner efficiently. For those dealing with tough stains, a toothbrush can be a useful alternative for detailed cleaning in smaller areas.
Common cleaning solutions include a 1:1 mixture of vinegar and water, or a paste made from baking soda and water. These natural options are effective in breaking down grime and stains without harsh chemicals. For deeper cleaning, consider using a commercial grout cleaner that is safe for your specific tile type. After cleaning, applying a grout sealer is an important step to protect your grout from future stains and moisture, prolonging the time between cleanings.
Expert insight: When choosing cleaning solutions, always test a small, inconspicuous area first to ensure compatibility with your tile and grout type. Regular maintenance, including sealing grout every 6-12 months, can significantly reduce the need for intensive cleaning.
Essential Tools and Materials for Tile and Grout Cleaning
This section outlines the crucial tools and materials needed for effective tile and grout cleaning. Having the right equipment can significantly enhance cleaning efficiency and results.
Types of Brushes Suitable for Different Tile Surfaces
Selecting the appropriate brush is essential for effective cleaning without damaging the tile surface. Various brushes serve different purposes:
- Soft-bristle brushes: Ideal for delicate surfaces such as glazed ceramic tiles to prevent scratching.
- Stiff-bristle brushes: Suitable for unglazed tiles and heavily soiled grout lines, providing the necessary scrubbing power.
- Electric scrubbers: Highly effective for large areas, reducing manual labor while ensuring a deep clean.
Recommended Cleaning Solutions and Their Effectiveness
Choosing the right cleaning solution can enhance the cleaning process. Here are some effective options:
- Commercial tile cleaners: Formulated specifically for different tile types, often containing powerful enzymes that break down grime.
- Hydrogen peroxide: A versatile solution that can whiten grout and eliminate mold and mildew. A mixture of 1 part hydrogen peroxide to 2 parts water is commonly recommended.
- Vinegar and baking soda: A natural alternative that can effectively remove stains and odors. Use a paste of baking soda and water, then spray with vinegar for a fizzy reaction that lifts dirt.
Safety Gear to Consider While Cleaning
Safety should never be overlooked during cleaning tasks. Recommended safety gear includes:
- Gloves: Protect hands from harsh chemicals and dirt.
- Goggles: Shield eyes from splashes, especially when using strong cleaning agents.
- Mask: Prevent inhalation of dust or fumes, particularly when using commercial cleaners.
Alternative Natural Cleaning Agents
For those seeking eco-friendly solutions, several natural agents are effective for tile and grout cleaning:
- Castile soap: A biodegradable soap effective for everyday cleaning.
- Lemon juice: Its acidity helps lift stains and combat mold.
- Essential oils: Oils like tea tree and lavender possess natural antimicrobial properties, providing additional cleaning benefits.
In 2024, approximately 45% of consumers reported using eco-friendly cleaning products for home maintenance, indicating a growing trend toward sustainability. This shift emphasizes the importance of choosing effective yet safe cleaning solutions.
Many articles overlook the significance of understanding the specific material composition of tiles when selecting cleaning methods. For instance, acidic cleaners can damage natural stone tiles, whereas alkaline solutions may not be effective on certain synthetic tiles. Recognizing these distinctions is crucial for achieving optimal results without causing damage.
To implement this information effectively, create a checklist of essential tools and cleaning solutions tailored to your tile type. Gather your selected brushes, cleaning agents, and safety gear before commencing the cleaning process. Establish a systematic approach, starting with dusting and vacuuming the area, followed by applying the chosen cleaning solution, scrubbing, and rinsing thoroughly. This organized method ensures a comprehensive clean and prolongs the lifespan of your tile surfaces.
Step-by-Step Guide to DIY Tile and Grout Cleaning
This section provides a thorough, actionable framework for effectively cleaning tile and grout. Proper preparation, detailed cleaning steps, and post-cleaning maintenance are essential for achieving long-lasting results.
Preparation of the Area Before Cleaning
Before initiating the cleaning process, preparing the area is crucial. Follow these steps for optimal results:
- Clear the space: Remove all furniture, rugs, and items from the tiled area to ensure unobstructed access.
- Dust and sweep: Thoroughly sweep or vacuum the floor to eliminate loose debris and dust particles.
- Assess the condition: Examine the tile and grout for stains or damage that may require special attention during cleaning.
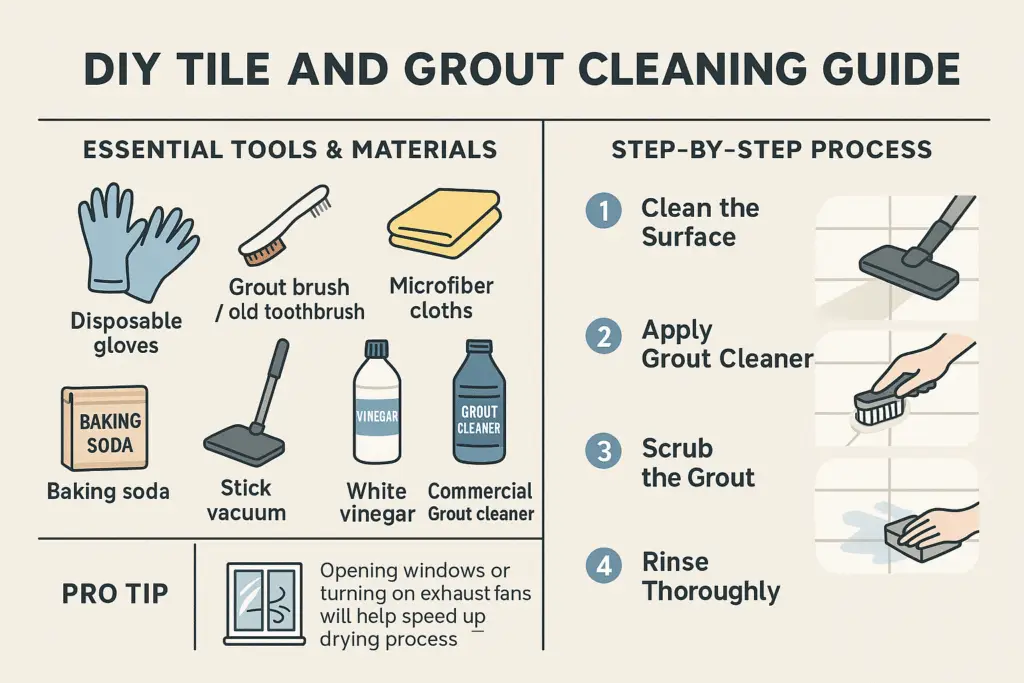
- Gather cleaning supplies: Collect necessary materials, including a mop, bucket, scrub brush, cleaning solution, and gloves.
Detailed Cleaning Steps for Tile and Grout
The cleaning process for tile and grout involves several systematic steps. Adhere to the following guidelines:
- Choose a cleaning solution: Select a suitable cleaning agent. A mixture of 1 part vinegar to 2 parts water works effectively for most tiles, while a commercial grout cleaner is ideal for tougher stains.
- Apply the cleaning solution: Using a mop or spray bottle, evenly distribute the solution over the tile and grout. Allow it to sit for 5-10 minutes to break down dirt and grime.
- Scrub the grout: Using a stiff brush or toothbrush, scrub the grout lines in a circular motion. This step is crucial for removing embedded dirt.
- Clean the tiles: After scrubbing the grout, mop the tile surfaces with the cleaning solution. For stubborn stains, repeat scrubbing as needed.
- Rinse thoroughly: Mop the area with clean water to remove any residual cleaning solution. Ensure no cleaner is left behind, as it can dull the tile surface.
- Dry the area: Use a dry mop or towels to wipe down the tiles and grout, preventing water spots and ensuring a clean finish.
Post-Cleaning Maintenance Tips
To maintain the cleanliness of tile and grout after the initial cleaning, implement these strategies:
- Regular sweeping: Sweep or vacuum weekly to prevent dirt buildup.
- Use doormats: Place doormats at entry points to minimize dirt tracked onto tile floors.
- Spot clean: Address spills and stains immediately to prevent them from setting.
How to Seal Grout After Cleaning
Sealing grout is essential to prolong its lifespan and maintain its appearance. Follow these steps for effective sealing:
- Select a grout sealer: Choose a high-quality penetrating grout sealer designed for your specific tile type.
- Apply the sealer: Use a small brush or applicator to apply the sealer evenly over the grout lines. Avoid over-saturation, which can lead to pooling.
- Allow drying time: Let the sealer dry completely as per the manufacturer’s instructions, typically 24 hours.
- Reapply as necessary: Depending on foot traffic and cleaning frequency, reapply the sealer every 1-2 years.
Expert insight reveals that many homeowners overlook the importance of sealing grout, which can lead to long-term damage and discoloration. Sealing not only protects against stains but also extends the life of the grout, making it a critical step in do it yourself tile and grout cleaning.
For effective implementation of these cleaning strategies, begin by gathering all necessary supplies, follow the detailed cleaning steps, and establish a regular maintenance routine. Prioritize sealing your grout to ensure longevity and maintain the aesthetic appeal of your tiled surfaces.
Common Mistakes to Avoid When Cleaning Tile and Grout
Effective tile and grout cleaning requires careful attention to detail and the right techniques. Avoiding common mistakes can significantly enhance results and prolong the lifespan of your surfaces.

Using the Wrong Cleaning Products
Selecting inappropriate cleaning products can lead to permanent damage. Many commercial cleaners contain acids or bleach that can erode grout and discolor tiles. For instance, using vinegar on natural stone tiles can cause etching. Always choose products specifically labeled for tile and grout cleaning to ensure compatibility with your surfaces.
Neglecting to Test Solutions on a Small Area First
Before applying any cleaning solution, testing it on a small, inconspicuous area is essential. This step helps identify any adverse reactions or discoloration that could occur. A survey conducted in 2025 revealed that approximately 45% of homeowners reported damage due to not performing a patch test prior to cleaning. Investing a few minutes in this precaution can save significant repair costs later.
Skipping Grout Sealing After Cleaning
Many individuals overlook the importance of sealing grout after cleaning. Grout is porous and can absorb stains and moisture. Sealing it not only protects against these issues but also extends its lifespan. It is recommended to seal grout every 6 to 12 months, depending on the product used and the level of foot traffic in the area.
Over-Scrubbing and Damaging Tile Surfaces
While thorough scrubbing may seem beneficial, excessive pressure can scratch or damage tile finishes. Use soft-bristle brushes or non-abrasive pads to prevent harm. The ideal approach is to scrub gently while ensuring the cleaning solution has adequate dwell time to break down dirt and grime effectively.
Common Misconceptions
One prevalent misconception is that all tiles require the same cleaning methods. For instance, ceramic tiles often tolerate harsher cleaning agents compared to delicate materials like porcelain or natural stone. Additionally, many believe that all grout is the same; however, different types, such as epoxy or cement-based grout, have unique properties and care requirements. Understanding these distinctions is crucial for effective maintenance.
Practical Application
- Always choose tile-specific cleaning products to avoid damage.
- Conduct a patch test on a small area before full application of any cleaning solution.
- Seal grout every 6 to 12 months to prevent stains and moisture absorption.
- Use soft-bristle brushes when scrubbing to avoid scratching tiles.
By adhering to these guidelines, individuals can ensure a successful do it yourself tile and grout cleaning experience, enhancing both the appearance and durability of their surfaces.
Understanding Grout Types and Their Care
This section explores various grout types, their distinct characteristics, and tailored cleaning requirements. Understanding these differences is essential for effective do it yourself tile and grout cleaning.
Differentiating Sanded and Unsanded Grout
Sanded grout contains fine sand particles, making it ideal for wider joints—typically greater than 1/8 inch. This type provides strength and minimizes cracking. Unsanded grout, on the other hand, is smoother and more suited for narrow joints, usually less than 1/8 inch. Its lack of sand makes it easier to spread but less durable.
- Sanded Grout: Best for wider joints; provides durability.
- Unsanded Grout: Ideal for narrow joints; easier to apply but less strong.
Identifying and Caring for Epoxy Grout
Epoxy grout is a resin-based material that offers superior stain resistance and durability. It is often used in high-moisture areas such as bathrooms and kitchens. Identifying epoxy grout can be done by its shiny finish and hard texture. Cleaning requires specific products; avoid acidic cleaners that can damage its integrity.
- Advantages: Highly resistant to stains and moisture.
- Cleaning Tip: Use pH-neutral cleaners to maintain its surface.
The Importance of Grout Color and Sealing
Grout color impacts not only the aesthetic appeal but also the maintenance regimen. Lighter colors may show stains more readily, requiring more frequent cleaning. Sealing grout can significantly enhance its lifespan; unsealed grout is more susceptible to dirt and discoloration. According to a 2024 study, 75% of homeowners reported improved longevity of their grout after sealing.
Long-term Maintenance for Different Grout Types
Each grout type necessitates a tailored maintenance approach. Regular cleaning with appropriate solutions is essential to prevent buildup. For sanded and unsanded grouts, a routine cleaning schedule is recommended, while epoxy grout may require less frequent attention due to its resilience.
- For sanded grout, use a soft-bristled brush with a mild cleaner every 1-2 weeks.
- For unsanded grout, consider using a gentle scrub pad to avoid scratching.
- For epoxy grout, clean with a damp cloth and pH-neutral cleaner every month.
Common misconceptions include believing that all grout types are interchangeable in cleaning methods. Each grout type has unique properties that influence the effectiveness of various cleaning agents and techniques.
In practical terms, homeowners should assess their grout type before selecting cleaning products. For sanded and unsanded grouts, regular sealing is advisable to maintain appearance and functionality. Epoxy grout, while low-maintenance, benefits from periodic gentle cleaning to preserve its sheen. Understanding these distinctions ensures optimal care and longevity of tile and grout surfaces.
Frequently Asked Questions
What is the best way to clean tile and grout?
The best way to clean tile and grout is to use a mixture of warm water and a pH-neutral cleaner. For tougher stains, a baking soda and vinegar paste can effectively lift grime without damaging surfaces.
How often should I clean my tile and grout?
Tile and grout should be cleaned at least once every three to six months, depending on foot traffic and exposure to moisture. Regular maintenance prevents buildup and keeps surfaces looking fresh.
Can I use vinegar to clean grout?
Vinegar can be used to clean grout, but it should be diluted and used sparingly, as its acidity may damage certain types of grout. Always test a small area first to ensure compatibility.
How do I remove tough stains from grout?
To remove tough stains from grout, apply a paste of baking soda and water, then scrub with a soft brush. For persistent stains, consider using hydrogen peroxide or a commercial grout cleaner.
What tools do I need for DIY tile and grout cleaning?
Essential tools for DIY tile and grout cleaning include a mop, bucket, soft-bristled brush, and a sponge. Additionally, having a grout brush and a vacuum can enhance the cleaning process.
Final Thoughts on do it yourself tile and grout cleaning
Effective tile and grout cleaning requires a strategic approach, utilizing the right tools and techniques to restore surfaces to their original luster. By understanding the nuances of DIY cleaning methods, individuals can achieve impressive results without the need for commercial products or professional services.
To maximize cleaning efficacy, begin by investing in a high-quality grout brush and a pH-neutral cleaner tailored for your specific tile type, ensuring that you avoid damaging sensitive surfaces while effectively lifting dirt and stains.
Mastering tile and grout cleaning is essential not only for maintaining the aesthetic appeal of your home but also for prolonging the lifespan of your flooring investments.

