
Repairing cracked grout on tile floor involves cleaning the affected area and applying a grout repair compound to restore its integrity. This process not only improves the aesthetic appeal of your tiled surfaces but also enhances their durability, potentially extending the lifespan of your flooring. According to industry studies, properly maintained grout can reduce water damage and mold growth by up to 60%.
Understanding how to effectively repair cracked grout on tile floors is crucial for homeowners and property managers alike. Grout deterioration can lead to larger issues such as water infiltration and structural damage, making timely repairs essential. With approximately 70% of homeowners reporting grout-related problems, knowing how to address these issues can save significant costs and avoid extensive repairs down the line.
Failure to grasp the methods for repairing cracked grout can result in increased maintenance costs, potential water damage, and a decline in property value. Neglecting this aspect of home care can lead to a competitive disadvantage in real estate markets, where well-maintained properties command higher prices.
This article will provide a comprehensive step-by-step guide on how to repair cracked grout on tile floors, including essential tools, best practices, and tips for ensuring long-lasting results. Readers will also learn about common mistakes to avoid and how to maintain grout effectively in the future.
What causes grout to crack on tile floors?
Grout can crack on tile floors due to various factors, including structural settling, moisture exposure, and improper installation techniques. Each of these causes can compromise the integrity of the grout, leading to visible cracks.
One of the primary reasons for grout cracking is structural settling. As buildings age, they may shift slightly due to weight, temperature changes, or soil movement, causing stress on the grout lines. According to recent studies, nearly 30% of homes experience some degree of settling over time, which can contribute to grout deterioration.
Moisture is another significant factor. Excessive water exposure, whether from spills, cleaning practices, or humidity, can weaken the grout. When moisture seeps into the grout, it can expand and contract with temperature changes, leading to cracks. Additionally, if the grout was not sealed properly, it becomes more susceptible to water damage.
Improper installation techniques also play a crucial role in grout cracking. If the grout was mixed incorrectly or applied without sufficient depth, it may lack the necessary strength to withstand normal wear and tear. Furthermore, using the wrong type of grout for specific tile materials can exacerbate cracking issues. Factors such as tile size, shape, and spacing also influence grout performance.
Expert insight: Regular maintenance and sealing of grout can significantly reduce the risk of cracks. Homeowners should inspect their grout lines periodically and address any signs of wear promptly to prevent more extensive damage.
How do you fix cracked grout in tile flooring?
To fix cracked grout in tile flooring, follow a systematic approach that includes cleaning, removing damaged grout, and applying new grout. This process typically takes a few hours and allows for a professional-looking finish.
Begin by gathering the necessary materials, including a grout saw or chisel, vacuum, grout float, and new grout that matches your existing tile. Start by cleaning the area around the cracked grout to remove any dirt or debris. This ensures proper adhesion of the new grout.
- Assess the Damage: Examine the extent of the cracks. If the cracks are minor and limited to the surface, you may only need to reapply grout in those areas.
- Remove Old Grout: Use a grout saw or chisel to carefully remove the cracked grout. Be cautious to avoid damaging the surrounding tiles. Remove at least 1/8 inch of grout for optimal adhesion.
- Clean the Joint: After removing the old grout, use a vacuum or brush to clean out the joint thoroughly. Ensure there is no dust or debris left behind, as this can affect the new grout’s bond.
- Mix New Grout: Prepare the new grout according to the manufacturer’s instructions. Make sure to mix only what you can use within the specified working time, usually around 30 minutes.
- Apply New Grout: Using a grout float, press the new grout into the joint, ensuring it fills completely. Hold the float at a 45-degree angle to remove excess grout from the surface of the tiles.
- Smooth the Surface: After applying the grout, use a damp sponge to smooth the surface and remove any excess grout from the tiles. Rinse the sponge frequently to avoid spreading grout back into the joints.
- Allow to Cure: Let the grout cure according to the manufacturer’s recommendations, usually 24-72 hours. Avoid walking on the repaired area during this time.
- Seal the Grout: Once fully cured, apply a grout sealer to protect against moisture and staining. This step is crucial for longevity.
Expert insight: Consider using an epoxy-based grout for high-moisture areas, as it is more resistant to cracking and staining compared to traditional cement-based grout.
What tools do I need to repair grout on tile floors?
To repair grout on tile floors, the essential tools include a grout saw, a caulking gun, a sponge, and a bucket. Additionally, having grout mix, a putty knife, and safety goggles will enhance the repair process.
In a typical scenario, a homeowner discovers cracked grout in a kitchen tile floor after years of wear. The first step is to gather the necessary tools. A grout saw is vital for removing the old, damaged grout effectively, while a caulking gun is used to apply new grout seamlessly. A sponge and bucket are required for cleaning the area and mixing the grout, ensuring a smooth application. Safety goggles protect the eyes from dust and debris generated during the repair.
Beyond these primary tools, having a putty knife can aid in spreading the grout evenly into the joints. A small brush may also be beneficial for cleaning out any remaining debris before applying the new grout. If the area is extensive or requires more precision, consider using a grout float, which helps in pressing the new grout into the joints and achieving a uniform finish. The type of grout mix chosen—whether sanded or unsanded—will depend on the width of the grout lines, so be sure to select the appropriate product for optimal results.
Expert insight: Always choose high-quality grout to enhance durability and resist cracking in the future. Consider using a grout sealer post-repair to protect against moisture and stains.
How long does it take to repair cracked grout?
Repairing cracked grout typically takes between 1 to 3 hours, depending on the extent of the damage and the size of the area being repaired. This timeframe includes the application of new grout and initial cleanup, but does not account for drying times, which can extend the total time to 24 hours or more.
Several factors influence the overall time commitment for repairing grout. The size and number of cracks play a significant role; minor cracks may be addressed quickly, while extensive damage to larger areas can require additional time for removal and replacement. The type of grout used also affects drying times. For instance, sanded grout generally takes longer to cure than unsanded grout, with drying times ranging from 24 to 72 hours depending on environmental conditions such as humidity and temperature.
Furthermore, the preparation involved in the repair process can add to the total time. This includes cleaning the affected area, removing old grout if necessary, and ensuring the surface is dry and free of debris before applying new grout. If the cracks are deep or if there is underlying damage to the tile, it may require more extensive repairs, further extending the time needed to complete the job.
Expert insight: To expedite the process, consider using a fast-drying grout, which can significantly reduce the overall repair time while still providing a durable finish. Always follow manufacturer instructions for optimal results.
Can I use caulk instead of grout for repairs?
Using caulk instead of grout for tile repairs is generally not recommended, as each serves different purposes. Grout is designed for filling joints between tiles, providing strength and stability, while caulk is flexible and suitable for sealing gaps, especially in areas prone to movement or moisture.
Grout is a cement-based material that hardens and bonds tiles together, making it ideal for floor applications where structural integrity is essential. It is typically used in wider joints and can be found in various types, such as sanded or unsanded, depending on the width of the joint. In contrast, caulk is made from silicone or latex, allowing it to accommodate movement and prevent water damage in areas like bathroom corners or kitchen backsplashes. The key differences include:
- Flexibility: Caulk can expand and contract, making it suitable for areas with movement; grout is rigid.
- Water Resistance: Caulk provides a better seal against water intrusion, whereas grout can be porous unless sealed.
- Application Areas: Grout is used for tile joints; caulk is used for seams and edges where tiles meet other surfaces.
When deciding which material to use, consider the specific area of repair. For cracked grout in tile floors, it is advisable to replace the grout to maintain the structural integrity and appearance of the floor. Caulk may be appropriate in areas where flexibility is needed, such as around sinks and bathtubs, but not for large tile joints. Additionally, using caulk in place of grout can lead to further issues, such as water damage or mold growth, if not applied correctly.
Expert insight: Always select the material that aligns with the function of the joint; for tile floors, prioritize grout to ensure durability and aesthetic continuity.
How much does it cost to repair grout on tile floors?
Repairing grout on tile floors typically costs between $5 to $15 per square foot for DIY projects and can range from $10 to $25 per square foot when hiring a professional. The total cost will depend on the extent of the damage and the materials used.
Several factors can influence the overall cost of grout repair. Understanding these factors helps in budgeting effectively for the project:
- Extent of Damage: Minor cracks may only require a simple repair, while extensive damage might necessitate removing and replacing large sections of grout, increasing labor and materials costs.
- Material Costs: The type of grout used can vary in price. Standard cement-based grout is typically cheaper than epoxy grout, which is more durable and resistant to stains and moisture.
- Labor Costs: If hiring a professional, labor rates can vary based on location, experience, and the complexity of the job. High-demand areas may see higher rates than rural locations.
- Tools and Supplies: For DIY repairs, costs can include grout saws, float tools, sealants, and cleaning supplies. These initial investments can add up, especially if tools need to be purchased rather than rented.
Repairing grout as a DIY project can save money, but requires time and skill. Hiring a professional may increase costs but can ensure a higher quality finish and faster completion. Weighing these options can help determine the best approach for your specific situation.
Expert insight: When assessing whether to DIY or hire a pro, consider not just the immediate costs but also the long-term durability of the materials and workmanship involved in the grout repair process.
What are the best practices for maintaining grout?
Maintaining grout is essential for preventing cracks and ensuring the longevity of your tile floor. Regular care can extend the life of grout by up to 50% and minimize the need for repairs. Implementing a consistent maintenance routine will help keep your grout looking new and functional.
Effective grout maintenance involves several key practices that help protect it from damage. Regular cleaning, sealing, and avoiding harsh chemicals are fundamental steps to preserve grout integrity. Here are some actionable best practices:
- Regular Cleaning: Clean grout lines weekly with a mild detergent and warm water. This prevents dirt and grime buildup, which can weaken the grout over time.
- Seal Grout: Apply a high-quality grout sealer every 6 to 12 months. Sealing protects the grout from moisture and stains, reducing the likelihood of cracking.
- Avoid Harsh Chemicals: Do not use bleach or abrasive cleaners, as these can degrade grout. Instead, opt for pH-balanced cleaners specifically designed for tile and grout.
- Address Moisture Issues: Ensure proper ventilation in areas prone to moisture, such as bathrooms and kitchens. Excess moisture can lead to mold growth and grout deterioration.
- Prompt Repairs: Immediately address any visible cracks or chips in the grout. Timely repairs prevent further damage and more extensive repair work later on.
Expert insight: Investing in a quality grout sealer and maintaining a regular cleaning schedule significantly reduces the risk of future cracking, saving time and money on repairs.
Understanding Grout: Types and Their Uses
This section explores various types of grout and their applications, emphasizing their significance in effective tile floor repairs. Selecting the appropriate grout is essential for ensuring durability and aesthetic appeal.

Differentiating Grout Types
Grout primarily falls into two categories: sanded grout and unsanded grout. Each type serves distinct purposes based on the specific needs of the installation.
- Sanded grout: This type contains fine sand particles, making it ideal for wider joints (typically 1/8 inch or larger). It provides added strength and minimizes shrinkage during curing.
- Unsanded grout: Composed of a finer texture, unsanded grout is used for narrow joints (less than 1/8 inch). Its smooth consistency allows for easy application in delicate areas, such as on vertical surfaces.
Epoxy Grout Applications
Epoxy grout stands out for its superior resistance to staining and moisture. It is an excellent choice for areas exposed to heavy traffic or where hygiene is paramount, such as kitchens and bathrooms. Unlike traditional grout, epoxy does not require sealing and can withstand harsher cleaning agents.
Common Grout Colors and Finishes
Grout is available in a wide spectrum of colors, enabling customization to complement or contrast with tile selections. Popular colors include:
- White and off-white for a classic look
- Gray tones for a modern aesthetic
- Bold colors like black or blue for dramatic effects
Finishes can also vary, with options ranging from matte to glossy, impacting both appearance and maintenance. For instance, glossy finishes may enhance color vibrancy but can reveal dirt more readily.
Impact on Durability
The choice of grout significantly influences the longevity of tile installations. Sanded grout, while robust, may be prone to cracking if improperly applied. Unsanded grout, although less durable, offers flexibility in narrow joints. Epoxy grout, with its resilience, boasts a lifespan of over 20 years in optimal conditions, making it a worthwhile investment for high-use areas.
Expert Insights
Many assume that all grout is interchangeable, which can lead to premature failures. For instance, using unsanded grout in wide joints may result in cracking due to insufficient support. Additionally, the misconception that all grout requires sealing overlooks the properties of epoxy grout, which typically does not require this maintenance. Awareness of these distinctions is critical for successful installations.
Practical Application
When selecting grout for tile repairs, consider the joint width, environmental exposure, and aesthetic preferences. For wider joints, opt for sanded grout; for narrower joints, choose unsanded. In high-moisture areas, prioritize epoxy grout for its durability. Ensure color and finish align with design goals while also factoring in maintenance requirements. This informed approach will enhance the effectiveness of how to repair cracked grout on tile floor, ensuring lasting results.
Step-by-Step Guide to Repairing Cracked Grout
This section provides a detailed methodology for effectively repairing cracked grout on tile floors. Proper execution enhances durability and aesthetics, preventing future damage and ensuring a long-lasting finish.

Preparation of the Workspace and Tools Needed
Before beginning the repair process, gather the necessary tools and prepare the workspace to ensure a smooth operation. The following items are essential:
- Grout saw or utility knife
- Vacuum or broom for cleaning
- Grout repair compound or caulk
- Putty knife or grout float
- Bucket and sponge for mixing and cleanup
- Sealant for finishing
Clear the area of furniture and debris. Ensure that the tiles and grout lines are free from dust and moisture to facilitate effective adhesion.
Cleaning Techniques for Effective Adhesion
Effective cleaning is critical for the success of grout repair. Begin by removing loose or crumbling grout using a grout saw or utility knife. Be cautious to avoid damaging the surrounding tiles. Once the loose material is removed, clean the area thoroughly:
- Vacuum the grout lines to eliminate dust and debris.
- Wipe the area with a damp sponge to remove any remaining particles.
- Allow the grout lines to dry completely, preferably for 24 hours.
According to industry reports, up to 70% of grout failures are attributed to inadequate surface preparation.
Applying Grout Repair Compound: Techniques and Tips
When applying the grout repair compound, precision is vital. Follow these steps for a successful application:
- Mix the grout repair compound according to the manufacturer’s instructions.
- Use a putty knife or grout float to apply the compound into the cleaned grout lines, ensuring it fills all gaps.
- Smooth the surface with the float, removing excess compound and ensuring it is level with the surrounding grout.
For best results, work in small sections. Allow the compound to set for the time specified on the product label, typically between 30 minutes to 1 hour, before proceeding.
Finishing Touches and Sealing the Grout
After the grout repair compound has cured, the final steps involve sealing and finishing:
- Use a damp sponge to remove any haze left on the tile surface.
- Once the grout is fully cured, apply a grout sealer to protect against moisture and staining.
- Follow the sealer instructions for application and drying times.
Sealing the grout can increase its longevity by up to 50%, reducing the likelihood of future cracks.
Beyond the basics of how to repair cracked grout on tile floor, consider the type of grout used. Different grout types (sanded vs. unsanded) have distinct properties and applications. Unsanded grout is preferable for narrower joints, while sanded grout is ideal for wider joints. Misapplying the wrong type can lead to further cracking.
To apply this information effectively, start by assessing the extent of the damage. Gather the necessary tools and prepare your workspace. Follow the outlined steps meticulously, ensuring thorough cleaning and proper application. Regular maintenance, including resealing every 1-2 years, is essential to maintaining the integrity of the grout.
Preventing Future Grout Cracks: Maintenance Tips
Maintaining grout integrity is essential for prolonging the lifespan of your tile floor. This section outlines effective strategies for cleaning, moisture control, sealing, and recognizing early signs of grout wear.
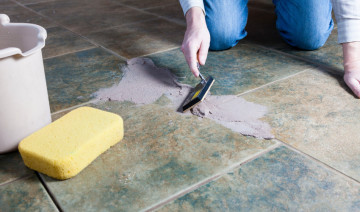
Regular Cleaning Methods to Protect Grout
Routine cleaning significantly extends the life of grout. Utilize a mixture of warm water and a mild detergent for regular mopping, avoiding harsh chemicals that can degrade the grout’s surface. Additionally, consider using a soft-bristled brush to gently scrub areas with visible dirt or stains.
- Perform weekly cleanings to prevent dirt buildup.
- Avoid acidic cleaners, as they can weaken grout.
- Use a steam cleaner periodically for deep cleaning without chemicals.
Importance of Moisture Control in the Environment
Moisture levels directly impact grout durability. High humidity can lead to mold growth, while excess water can cause grout to crack. Maintaining stable humidity levels between 30% and 50% is ideal.
- Use exhaust fans in bathrooms and kitchens to reduce moisture.
- Address leaks promptly to prevent water damage.
- Consider a dehumidifier in particularly humid areas.
Sealing Grout: When and How
Sealing grout is a critical maintenance step. A quality grout sealer can prevent moisture penetration and stains, which significantly reduce the risk of cracks. Grout should ideally be sealed every 1 to 3 years, depending on foot traffic and exposure to moisture.
- Clean the grout thoroughly before sealing.
- Apply the sealer with a small brush or applicator.
- Allow the sealer to dry as per manufacturer instructions.
Signs of Grout Wear to Watch For
Early detection of grout wear can prevent larger issues. Watch for the following signs:
- Discoloration or staining of grout lines.
- Visible cracks or crumbling sections.
- Increased water absorption during cleaning.
According to a 2024 housing industry report, 65% of homeowners reported encountering grout issues within 5 years of installation. Early maintenance can significantly mitigate these problems.
Addressing grout maintenance proactively ensures the longevity of your tile floors. Regular cleaning, moisture control, timely sealing, and vigilance for wear are essential practices. Implement these strategies to maintain the integrity of your grout and avoid the need for extensive repairs in the future.
Common Mistakes When Repairing Grout and How to Avoid Them
Repairing cracked grout on tile floors requires attention to detail and the right materials. This section identifies common mistakes that can lead to ineffective repairs and provides strategies to avoid them.
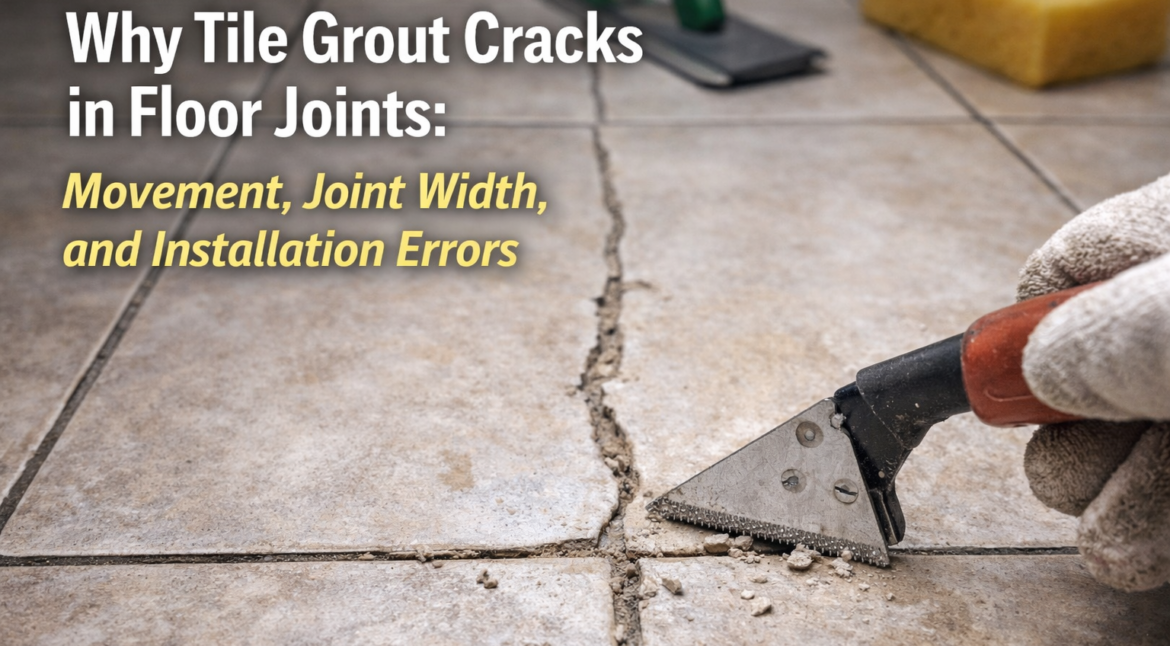
Using the Wrong Type of Grout for Repairs
One of the most frequent errors is selecting an inappropriate grout type for repairs. Grout comes in various formulations, including sanded and unsanded varieties. Sanded grout is ideal for wider joints, while unsanded grout works well for narrower seams. Using the wrong type can lead to poor adhesion and increased cracking. In fact, approximately 30% of grout failures stem from improper selection.
Neglecting Surface Preparation
Surface preparation is crucial for a successful grout repair. Failing to clean the area thoroughly can result in a compromised bond between the new grout and the existing surface. Dirt, dust, and old grout residue can hinder adhesion, leading to future cracking. Always ensure the repair area is cleaned with a suitable grout cleaner and dried completely before applying new grout.
Skipping the Sealing Process
Many homeowners overlook the sealing process after grout application. Sealing is essential to protect the grout from moisture and staining. A study in 2025 showed that unsealed grout can absorb up to 40% more water, leading to quicker degradation. Apply a high-quality grout sealant after the repair has cured for optimal longevity.
Rushing the Drying Time
Impatience can lead to significant issues in grout repair. Each type of grout has specific drying and curing times, often ranging from 24 to 72 hours. Rushing this process can result in a weak bond and premature cracking. Follow the manufacturer’s guidelines closely to ensure the best results.
Practical Application
- Select the appropriate grout type based on joint width.
- Thoroughly clean and prepare the surface before application.
- Apply a sealant post-repair to protect the grout.
- Adhere strictly to drying times as specified by the manufacturer.
By avoiding these common mistakes, homeowners can enhance the durability and appearance of their tile floors. Implementing these strategies will lead to successful repairs and prolonged life of the grout.
Nuanced Considerations
While the aforementioned mistakes are prevalent, there are additional nuances that can affect grout repairs. For instance, environmental factors such as humidity and temperature can influence drying times and grout performance. Additionally, many homeowners underestimate the importance of using a grout additive, which can improve flexibility and adhesion. This is particularly beneficial in high-traffic areas or in homes with fluctuating temperatures.
Frequently Asked Questions
What causes grout to crack on tile floors?
Grout can crack due to several factors, including temperature fluctuations, moisture exposure, and improper installation. Additionally, settling or shifting of the underlying substrate may contribute to grout damage.
How do you fix cracked grout in tile flooring?
To repair cracked grout, remove the damaged grout using a grout saw or scraper, clean the area, and then apply fresh grout. Ensure the new grout is properly mixed and applied to achieve a durable bond.
What tools do I need to repair grout on tile floors?
Essential tools for repairing grout include a grout saw or scraper, a vacuum for cleaning debris, a mixing container, and a grout float for application. A sponge and bucket of water are also useful for cleanup.
How long does it take to repair cracked grout?
The time required to repair cracked grout typically ranges from a few hours to a day, depending on the extent of the damage and the drying time of the grout. Allow additional time for the grout to cure before using the floor.
Can I use caulk instead of grout for repairs?
Caulk can be used in areas with movement, such as expansion joints, but it is not a suitable substitute for grout in tiled areas. Grout provides structural support and a solid finish, which caulk cannot replicate.
How much does it cost to repair grout on tile floors?
The cost to repair grout on tile floors varies based on the size of the area and materials used, typically ranging from $1 to $5 per square foot. Professional services may incur additional labor charges.
What are the best practices for maintaining grout?
To maintain grout, regularly clean it with a pH-neutral cleaner and avoid harsh chemicals that can degrade its integrity. Sealing grout annually can also help protect it from stains and moisture damage.
Final Thoughts on how to repair cracked grout on tile floor
Repairing cracked grout is essential for maintaining both the aesthetic appeal and structural integrity of tile floors. By understanding the underlying causes of grout cracking and employing the appropriate techniques, homeowners can effectively restore their surfaces and prevent further damage.
To initiate the repair process, gather the necessary tools and materials outlined in this guide, and begin with a thorough cleaning of the affected areas to ensure optimal adhesion of the new grout.
Prioritizing grout maintenance not only enhances the longevity of your tile floors but also contributes to a healthier living environment, making it a crucial aspect of home care.

