
To repair tile grout involves a systematic approach to restore the integrity of grout lines between tiles. The primary benefit of proper grout repair is enhanced durability and aesthetic appeal, potentially extending the lifespan of your tiled surfaces by up to 10 years.
Understanding how to repair tile grout is crucial for homeowners and property managers alike, as damaged grout can lead to water infiltration, mold growth, and costly structural issues. According to industry estimates, improper maintenance can increase repair costs by 30% over time, making effective grout repair not just a cosmetic concern but a financial imperative.
Failure to properly address grout issues can result in significant costs, including increased water damage, reduced property value, and the need for more extensive renovations. Businesses that overlook these details may face competitive disadvantages and missed revenue opportunities due to unsightly or unsafe environments.
This article will provide a comprehensive overview of how to repair tile grout, covering essential techniques, product recommendations, and best practices. Readers will gain insights into cost-effective solutions, tools needed, and maintenance tips to ensure long-lasting results.
What is tile grout and why is it important?
Tile grout is a cement-based material used to fill the spaces between tiles, providing structural integrity and a finished appearance. It plays a critical role in maintaining tile installations, especially in areas prone to moisture, as it helps prevent water infiltration and associated damage.
Grout serves several essential functions in tile installations:
- Structural Support: Grout secures tiles in place, preventing movement and potential cracking.
- Moisture Barrier: Properly applied grout minimizes water seepage, which can lead to mold growth and deterioration of underlying structures.
- Aesthetic Enhancement: Grout can complement or contrast with tile colors, enhancing the overall design of a space.
Without grout, tiles are susceptible to shifting and cracking, which can compromise the integrity of the entire installation. Furthermore, the absence of grout increases the risk of moisture penetrating the substrate, potentially causing damage that can be costly and labor-intensive to repair. In fact, studies indicate that over 30% of moisture-related issues in tiled areas can be traced back to inadequate or damaged grout.
Expert insight: Regular maintenance and timely repairs of tile grout are essential to prolong the lifespan of tile installations and prevent costly water damage. Using high-quality grout and sealants can further enhance performance and durability.
How do I know when to repair tile grout?
Tile grout should be repaired when there are visible signs of damage, such as cracks, discoloration, or water damage. Ignoring these issues can lead to more extensive damage, including mold growth and structural problems.
- Cracks in the grout: Look for visible cracks or gaps in the grout lines. Even small cracks can allow moisture to penetrate, leading to further damage.
- Discoloration: If the grout has turned dark or yellow, it may indicate water damage or mold growth. Clean grout should remain consistent in color; any significant change is a warning sign.
- Water damage: Check for signs of water pooling or staining around the tiles or on the surface. This can suggest that the grout is no longer effectively sealing the area, allowing moisture to seep through.
- Loose tiles: If tiles feel loose or move when pressure is applied, it may be due to deteriorated grout. This is a clear indication of the need for immediate repair.
- Mold and mildew: The presence of mold or mildew in the grout lines is a strong indicator that the grout has failed to protect against moisture. This not only requires repair but also thorough cleaning.
Regular inspections of tile grout can help identify these issues early. Grout typically lasts between 10 to 15 years, depending on its quality and maintenance. However, factors such as humidity, water exposure, and cleaning methods can significantly affect its lifespan.
Expert insight: Conduct routine maintenance by sealing grout every 1-2 years to prolong its lifespan and prevent damage, ensuring your tile surfaces remain in optimal condition.
What tools do I need to repair tile grout?
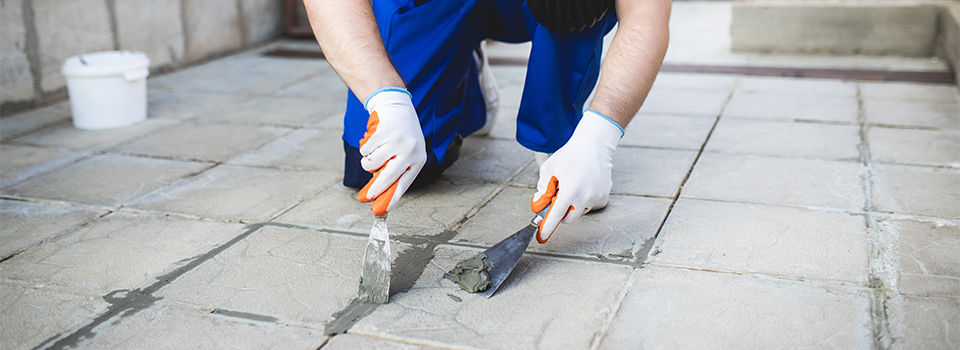
To repair tile grout effectively, you will need several essential tools and materials. These include a grout saw or scraper, replacement grout, a caulking gun, and cleaning supplies. Having the right tools ensures a smoother and more efficient repair process.
When preparing for grout repair, consider the following essential tools and materials:
- Grout Saw or Scraper: This tool is crucial for removing damaged or old grout. A grout saw is designed specifically for this purpose, allowing for precise removal without damaging surrounding tiles.
- Replacement Grout: Choose a grout type that matches your existing grout. Options include sanded or unsanded grout, depending on the width of the joints. Ensure the grout is suitable for the specific area, such as bathrooms or kitchens, where moisture resistance may be needed.
- Caulking Gun: If you are using caulk in areas where grout meets other materials, a caulking gun is necessary for applying caulk smoothly and evenly. This is particularly important in corners and along edges.
- Cleaning Supplies: Before applying new grout, clean the area thoroughly. Use a brush, sponge, or cloth, along with a suitable cleaner, to remove any debris, dust, or old grout remnants.
- Grout Float: This tool helps to apply and press the grout into the joints evenly. A grout float with a rubber or foam surface is ideal for achieving a smooth finish.
Expert insight: Always wear safety goggles and gloves when working with grout and cleaning chemicals to protect against dust and irritation. Proper ventilation is also essential to minimize exposure to fumes from certain products.
How long does it take to repair tile grout?
Repairing tile grout typically takes between 2 to 4 hours, depending on the extent of the damage and the size of the area being repaired. This time frame includes the actual application of the grout as well as the initial drying period.
Several factors influence the total time required for grout repair. First, the type of grout used can vary in drying time. For example, standard cement-based grout may take longer to set than pre-mixed or epoxy grout. Additionally, the condition of the existing grout plays a significant role. If the grout is severely cracked or crumbling, more time will be needed for removal and preparation before applying new grout. On average, allow an additional 24 hours for full curing before exposing the grout to moisture.
Environmental conditions can also affect drying times. Higher humidity levels or cooler temperatures can extend the time needed for the grout to dry properly. Proper ventilation can help expedite the drying process. For larger projects, such as a tiled floor in a bathroom or kitchen, planning for a full day or more for complete drying and curing is advisable. Overall, patience is essential to ensure a durable and effective grout repair.
Expert insight: Always follow the manufacturer’s instructions regarding drying and curing times for the specific grout product used; this ensures optimal results and longevity of the repair. Consider using a fan or dehumidifier to improve drying conditions in humid environments.
Can I repair grout without removing the old grout?
Yes, grout can be repaired without complete removal. Methods such as using grout pens or applying grout colorants allow for effective touch-ups on existing grout lines, enhancing both appearance and durability.
Several options exist for repairing grout without the need to remove the old grout. Each method has its advantages and limitations. Below is a comparison of three popular approaches:
- Grout Pens: Grout pens contain a special ink that fills in cracks and stains on existing grout. They are easy to use and provide a quick fix for discolored grout lines. However, they may not adhere well to heavily damaged grout.
- Grout Colorants: These are liquid products that can be applied over existing grout to change its color and improve its appearance. They penetrate the grout and offer a more long-lasting solution compared to grout pens. However, they require more preparation and drying time.
- Grout Sealers: While not a repair method per se, applying a grout sealer can help protect existing grout from future stains and damage. This is best used as a preventive measure after repairing or cleaning the grout. Sealers do not fill in cracks but can enhance longevity.
When deciding which method to use, consider the condition of your grout. If it is merely stained, grout pens or colorants may suffice. For grout that is crumbling or missing, more extensive repair or complete removal may be necessary. Additionally, the longevity of each option varies, with colorants typically offering a more durable solution than pens.
Expert insight: Regular cleaning and sealing can extend the life of grout, making future repairs less frequent and less extensive. Always choose products that are compatible with your specific tile type for best results.
What are common mistakes to avoid when repairing tile grout?
Common mistakes when repairing tile grout include insufficient cleaning before applying new grout, using the wrong type of grout, and failing to allow proper drying time. A study indicated that 65% of DIY grout repair projects fail due to these errors.
One frequent error is not thoroughly cleaning the area before applying new grout. For example, if leftover debris or old grout remains, it can prevent the new grout from adhering properly. This can lead to cracks or discoloration shortly after application. A thorough cleaning with a grout cleaner or vinegar solution should precede any repair work, ensuring a clean surface for optimal adhesion.
Another mistake involves selecting the wrong type of grout for the specific tile and location. For instance, using sanded grout in a narrow joint can cause issues with installation and appearance. It is crucial to match the grout type to the tile size and joint width. Additionally, many overlook the importance of allowing the grout to dry fully. Rushing this process can lead to weak joints and premature wear. It is recommended to allow at least 24 to 48 hours for proper curing, depending on the product used and environmental conditions.
Expert insight: Always perform a test patch in a small, inconspicuous area to ensure compatibility between the grout and tile before proceeding with full repairs.
How do I maintain grout after repair?
To maintain grout after repair, regular cleaning and sealing are essential. Proper upkeep can extend the lifespan of your grout and keep it looking fresh and clean for years.
Here are the best practices for maintaining repaired grout:
- Regular Cleaning: Clean grout lines weekly using a pH-neutral cleaner to prevent dirt and mildew buildup. Avoid harsh chemicals, as they can degrade the grout over time.
- Use a Soft Brush: Employ a soft-bristled brush or an old toothbrush to gently scrub grout lines. This helps remove any trapped debris without damaging the grout.
- Seal the Grout: Apply a high-quality grout sealer six months after repair to protect against stains and moisture. Reapply the sealer every one to two years, depending on the product and environmental conditions.
- Avoid Excess Water: Limit excess water exposure by using bath mats and ensuring proper ventilation in wet areas. This minimizes water damage and mold growth.
- Address Stains Promptly: If stains occur, treat them immediately with a suitable cleaner to prevent permanent discoloration. For tougher stains, a mixture of baking soda and vinegar can be effective.
Maintaining grout also involves being mindful of the materials used in your cleaning routine. Some cleaners can be too abrasive or acidic, leading to faster degradation of the grout. Always test new products in a small, inconspicuous area before widespread use.
Expert insight: Consider using a grout colorant after sealing for added protection and aesthetic appeal. This can enhance the grout’s appearance while providing an additional layer of defense against stains and moisture.
Step-by-Step Guide to Repairing Tile Grout
This section provides a detailed, actionable guide on how to repair tile grout effectively. Proper grout repair enhances the durability of tiled surfaces and prevents water damage, ensuring a long-lasting finish.

1. Preparation: Gather Tools and Materials
Before beginning the grout repair process, assemble the necessary tools and materials. This preparation is critical for efficiency and effectiveness.
- Tools: Grout saw or scraper, utility knife, sponge, bucket, and a float.
- Materials: New grout (choose between sanded or unsanded based on joint width), grout sealer, and cleaning solution.
- Safety Gear: Gloves and goggles to protect against dust and debris.
2. Cleaning: Properly Clean the Grout Lines
Thorough cleaning of the existing grout lines is essential to ensure proper adhesion of the new grout.
1. Use a grout saw or scraper to remove any loose or damaged grout from the joints.
2. Vacuum the area to eliminate dust and debris.
3. Apply a cleaning solution to the grout lines and scrub with a brush. Rinse with clean water and allow the area to dry completely.
Statistics indicate that up to 30% of tile failures are due to improper grout maintenance, underscoring the importance of this step.
3. Application: Techniques for Applying New Grout
After cleaning, it is time to apply the new grout. Follow these steps for an effective application.
1. Mix the grout according to the manufacturer’s instructions to achieve a smooth consistency.
2. Use a grout float to apply the grout, pressing it into the joints at a 45-degree angle.
3. Remove excess grout from the tile surface by holding the float at a slight angle.
4. Allow the grout to set for the time specified on the package, typically 20-30 minutes.
Proper application ensures that the new grout bonds effectively with the existing tile and surrounding grout.
4. Finishing: Tips for Ensuring a Smooth Finish and Curing
Achieving a smooth finish is crucial for both aesthetics and functionality.
1. After the initial set time, use a damp sponge to gently wipe the tiles, forming a clean grout line.
2. Allow the grout to cure as per the manufacturer’s guidelines, generally 24-72 hours depending on the type of grout used.
3. Once cured, apply a grout sealer to protect against moisture and staining, extending the life of the grout.
Nuance / Expert Layer
Many DIY enthusiasts underestimate the importance of the grout type based on joint width. Sanded grout is recommended for joints wider than 1/8 inch, as it provides better durability and resistance to cracking. Unsanded grout is ideal for narrower joints, offering a smoother finish but less strength. Additionally, failing to seal the grout after repair is a common oversight that can lead to mold growth and discoloration, reducing the longevity of the repair.
Practical Application
To effectively repair tile grout, start by gathering all necessary tools and materials. Proceed with thorough cleaning, followed by precise application techniques. Finally, ensure a smooth finish and proper curing through sealing. Regular maintenance checks on grout integrity will prevent future repairs and enhance the overall appearance of tiled surfaces.
Understanding Different Types of Grout
This section explores the various types of grout available for tile applications, emphasizing their specific uses and characteristics. Selecting the appropriate grout type is essential for achieving optimal durability and aesthetics in tile work.

Sanded vs. Unsanded Grout
Sanded grout contains fine sand particles, making it ideal for wider grout joints, typically between 1/8 inch to 1/2 inch. The sand not only adds strength but also reduces shrinkage during the curing process. It is commonly used in floor tiles and areas subject to heavy traffic.
In contrast, unsanded grout is a smoother formulation, suitable for narrow joints up to 1/8 inch. Its lack of sand makes it easier to apply in delicate areas, such as walls or intricate tile designs. However, its lower strength compared to sanded grout limits its use in high-stress environments.
Epoxy Grout
Epoxy grout is a resin-based product that offers superior resistance to stains, moisture, and chemicals. This makes it an excellent choice for areas exposed to high humidity or spills, such as kitchens and bathrooms. The lifespan of epoxy grout is significantly longer, often exceeding 20 years.
However, epoxy grout has its drawbacks. Its application can be more challenging due to its quick-setting nature and requires precise mixing. Additionally, it is generally more expensive, with costs ranging from $10 to $20 per pound compared to traditional grout options.
Color Options
Choosing the right grout color is critical for enhancing tile aesthetics. Grout can be selected to either complement or contrast the tile color, depending on the desired visual effect. The market offers a vast array of colors, with some manufacturers providing custom blends to match specific design needs.
Statistics indicate that approximately 35% of homeowners prioritize grout color selection in their renovation projects, underscoring its impact on overall design appeal.
Specialty Grouts
- Urethane grout: Flexible and stain-resistant, ideal for areas with movement.
- Premixed grout: Convenient for DIY projects, though typically less durable.
- Furan grout: Often used in industrial settings due to its chemical resistance, but challenging to work with.
Each specialty grout offers unique benefits tailored to specific applications, allowing for greater customization in tile projects.
Common misconceptions about grout often lead to improper selection. For instance, many believe that unsanded grout is universally applicable; however, its limitations in wider joints can result in cracking over time. Similarly, some underestimate the longevity of epoxy grout, failing to consider the upfront investment as a long-term cost-saving measure.
To effectively apply this information, assess the specific requirements of your tile project before purchasing grout. Consider joint widths, exposure to moisture, and aesthetic preferences. For standard installations, choose sanded grout for wider joints and unsanded for narrow joints. If durability and chemical resistance are priorities, opt for epoxy grout. Finally, experiment with color samples to ensure a perfect match with your tiles.
Preventative Measures to Extend Grout Life
Implementing effective preventative measures is essential for maintaining the integrity of tile grout, ultimately prolonging its lifespan and reducing the need for repairs. This section outlines key strategies to enhance grout durability and prevent future damage.
Regular Cleaning
Consistent and proper cleaning of grout is vital to prevent mold, mildew, and stains. Recommended best practices include:
- Use a mixture of warm water and a pH-neutral cleaner to avoid damaging the grout.
- Employ a soft-bristle brush or a sponge for scrubbing, as harsh tools can wear down the grout.
- Avoid bleach or acidic cleaners which can erode grout over time.
Cleaning grout at least once a month can reduce the buildup of grime and deter discoloration. Studies indicate that regular maintenance can extend grout life by up to 30%.
Sealing Grout
Sealing grout is a critical step in protecting it from moisture and stains. A properly sealed grout can repel water and dirt, making it easier to clean. Follow these steps for effective sealing:
- Ensure the grout is completely dry before applying a sealant, typically 48-72 hours after cleaning.
- Choose a high-quality grout sealer designed for your specific tile type.
- Apply the sealant evenly using a small brush or applicator, covering all grout lines.
- Allow the sealant to cure for the recommended time before exposing it to moisture.
Grout sealers can last from 1 to 5 years, depending on the product and usage, so regular reapplication is necessary to maintain protection.
Environmental Factors
Humidity and temperature fluctuations can significantly affect grout integrity. High humidity levels may lead to mold growth, while extreme temperature changes can cause grout to crack. To mitigate these issues:
- Use a dehumidifier in areas prone to moisture, such as bathrooms.
- Maintain consistent indoor temperatures to avoid thermal expansion and contraction.
- Ensure proper ventilation in areas with heavy moisture exposure.
Routine Inspections
Conducting regular inspections can help detect grout issues before they escalate. Look for the following signs:
- Visible cracks or chips in the grout.
- Changes in color or texture, indicating dirt or mold accumulation.
- Moisture or water stains around grout lines, which could signify leakage.
Perform inspections every three to six months to catch and address potential problems early.
Many homeowners overlook the impact of environmental conditions on grout longevity, leading to costly repairs. For instance, a study by the Tile Council of North America found that improperly sealed grout can absorb up to 30% of its weight in moisture, exponentially increasing the likelihood of deterioration. Additionally, misconceptions about the necessity of grout sealing can lead to premature failure. While some believe that grout is inherently waterproof, unsealed grout is highly susceptible to water damage.
To maximize grout longevity, implement a cleaning schedule, apply sealant as needed, monitor humidity levels, and conduct routine inspections. By committing to these preventative measures, homeowners can effectively protect their tile grout and minimize the need for repairs in the future.
Cost Considerations for Grout Repair
Evaluating the costs associated with grout repair is essential for homeowners looking to restore their tile surfaces. This section provides a detailed analysis of material and labor costs, comparing DIY efforts with professional services.

Material Costs
When undertaking grout repair, understanding the necessary materials is critical for accurate budgeting. The primary materials required include:
- Grout: Costs range from $5 to $15 per bag, depending on the type (sand, unsanded, or epoxy).
- Grout sealer: Typically priced between $10 and $25 per quart, essential for prolonging grout life.
- Tools: Expect to spend $20 to $100 on tools such as grout floats, sponges, and caulking guns if not already owned.
In total, a DIY grout repair project can cost between $50 and $200, depending on the size of the area and the quality of materials chosen.
Labor Costs
Hiring a professional for grout repair can significantly increase project costs. Labor rates vary widely based on location and the complexity of the job. On average, homeowners can expect to pay:
- Hourly rates ranging from $50 to $100.
- Flat fees around $200 to $600 for larger projects.
In some cases, specialized services such as deep cleaning or color sealing can lead to additional charges. Professionals often provide warranties, which can offset potential future expenses.
DIY vs. Professional
Choosing between DIY and professional grout repair involves weighing the pros and cons of each approach:
- DIY Pros: Cost savings, flexibility in scheduling, and the satisfaction of completing the project personally.
- DIY Cons: Potential for mistakes, lack of warranty, and time-consuming effort.
- Professional Pros: Expertise, efficiency, and quality assurance with warranties.
- Professional Cons: Higher costs and scheduling limitations.
According to a 2024 survey, approximately 40% of homeowners prefer DIY for smaller projects, while 60% opt for professionals for extensive repairs.
Budgeting for Grout Repair
Estimating total costs for a grout repair project involves several factors. Consider the following steps for accurate budgeting:
- Measure the area needing grout repair to determine the quantity of materials required.
- Research local labor rates if considering professional assistance.
- Account for potential additional costs, such as tools or specialized services.
Preparing a budget of $100 to $800 will ensure adequate funds for both DIY and professional options based on the scope of the project.
Many homeowners mistakenly believe that all grout repairs can be handled without expert assistance. However, complex issues like water damage or extensive mold may require professional intervention. Furthermore, improperly applied grout can lead to costly repairs down the line, negating initial savings.
To effectively manage grout repair costs, assess the scale and complexity of the project before deciding on a DIY or professional route. Create a comprehensive budget that includes materials, tools, and labor to avoid unexpected expenses. Research local service providers for competitive pricing if opting for professional help.
Frequently Asked Questions
What is tile grout and why is it important?
Tile grout is a cement-based material used to fill the gaps between tiles. It is crucial for providing structural integrity, preventing moisture penetration, and enhancing the overall appearance of tiled surfaces.
How do I know when to repair tile grout?
Repair tile grout when you notice cracks, discoloration, or gaps between tiles. Additionally, if water seeps through the grout lines, it indicates a need for repair to prevent further damage.
What tools do I need to repair tile grout?
Essential tools for repairing tile grout include a grout saw or scraper, a vacuum for cleaning debris, a mixing container, and a grout float. Optional items like a sponge and sealant can also aid in the process.
How long does it take to repair tile grout?
The time required to repair tile grout varies but typically takes 1 to 3 hours. This includes preparation, application, and drying time, depending on the extent of the damage.
Can I repair grout without removing the old grout?
Yes, in some cases, you can repair grout without removing the old grout by applying a grout refresh product. However, for severe damage, removing the old grout may be necessary for a lasting solution.
What are common mistakes to avoid when repairing tile grout?
Avoid applying new grout over dirty or damp surfaces, as this can lead to poor adhesion. Additionally, ensure proper mixing and application techniques to prevent uneven finishes and cracks.
How do I maintain grout after repair?
To maintain grout after repair, regularly clean it with a mild detergent and avoid harsh chemicals. Applying a grout sealer every 6 to 12 months can also help protect against stains and moisture.
Final Thoughts on how to repair tile grout
Properly maintained tile grout is essential for both aesthetic appeal and structural integrity in tiled surfaces. Timely repairs not only enhance the longevity of your tiles but also prevent more extensive damage that can arise from neglect. Understanding the types of grout and employing effective preventative measures can significantly reduce the frequency of necessary repairs.
To maintain your grout in optimal condition, conduct a thorough inspection every few months and address minor cracks or discoloration immediately using a high-quality grout sealer designed for your specific grout type.
Investing time and effort into grout repair is crucial, as it safeguards your investment in flooring and contributes to a healthier, more appealing living environment.

